Friday Inspiration: Julieanne Kost

RejuvinationFlat

As I look around for ‘how to’ resources for lightroom and photoshop one of the people that I continually come back to is Julieanne Kost. Julieanne is the Principal Digital Imaging Evangelist for Adobe Systems, which means that she spends much of her time on the road speaking at conferences and teaching how to get the most out of lightroom and photoshop. I recently worked through her ‘Advance Photoshop Layers‘ course on the CreativeLive site which was excellent. She’ll be teaching during the upcoming Photoshop week on CreativeLive which will be worth checking out.

Many of the examples that Julieanne uses during her demonstrations are from her personal projects. Her book Window Seat is quite interesting and now available as a digital book. Well worth a look. It’s the photoillustrations, such as the one above, that of course really capture my attention given my interest in assembling images from parts. Check out the videos below to see more of how these are constructed:

New York, New York!

Nixon_141006_1767

I was in New York recently – what an amazing place. More vibrant at 10.30 pm than 2 pm.

I’m thinking about community this week – who listens when you talk, supports you when you need to be supported, and kicks you in the pants when you need to be spurred on to be as good as you can be?

On Being Minimalist, Or Not

I’ve been using Chris Brogan’s system of three words this year instead of goals or intentions or what have you. I would argue that I’ve actually been quite successful for the most part using this approach to direct my focus for the year.

My three words are healthy, minimalist & creative.

For healthy, I altered my diet, have daily mobility exercises that I do, I go to the gym a few times a week and as a result I’ve lost 50lbs and feel a whole lot better. As an aside if you want to know exactly what I’m doing send me an email. I’d be more than happy to help you guide you through the first month or so.

While it can be difficult to measure creativity I’ve been tracking the number of images in my lightroom catalog, the number of images finished and imags submitted to exhibitions. By these measures I’m on track to easily surpass the equivalent numbers for last year. All good there.

Minimalist? No so much. I knew this would be a tough one for me but something that I needed to get a handle on. I’ve revamped my financial accounting systems, so that I actually have them now, and would at least say that my spending is intentional and aligned with the things that are important to me but I’m still accumulating stuff.

I was reminded about this when I was thinking about the basics of the GTD system last week. While we dealt largely with how to sort and process collected items there are five steps that provide the foundation for GTD.

Capture – the collection phase, corral everything both physical and electronic that has your attention
Clarify – preliminary processing, what does each collected item mean? Is there an action associated with it?
Organize – parse out the actions onto the appropriate lists
Review – don’t let your lists become stale. Check in with them as often as needed to ensure that they are remaining current.
Engage – work the system to do the work.

What I’ve been finding is that having become healthier I have more energy and that funnels into being more creative and generally curious. What about this and what if that, questions that usually result in reading and the accumulation of more reference material. I’ve taken over the largest room in the house for my reference material and support materials for image making. Not exactly the behavior of a confirmed minimalist.

I’m almost ready to give up on the idea of being minimalist and instead ready to settle for being intentional and aligned with my larger goals. What about you? How are you doing with progress towards annual goals? Any that you’re ready to throw in the towel on? How are you dealing with that?

Practicing at Practicing

Nixon_130515_4122-Edit

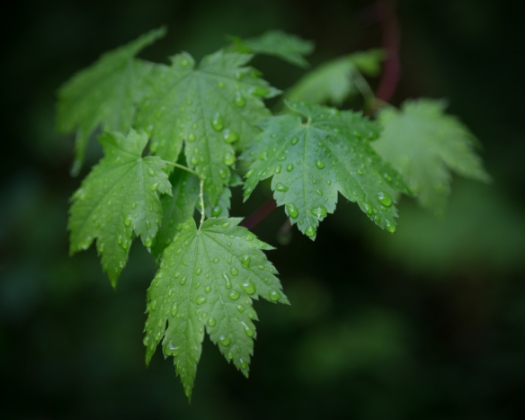
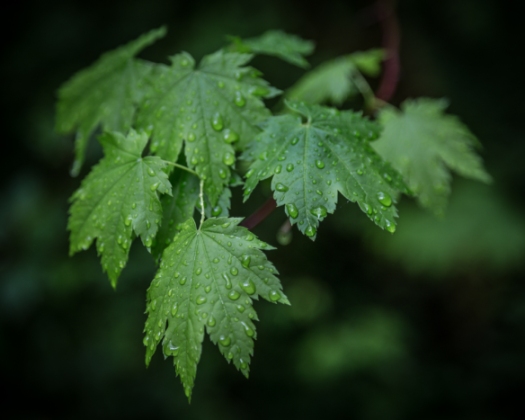
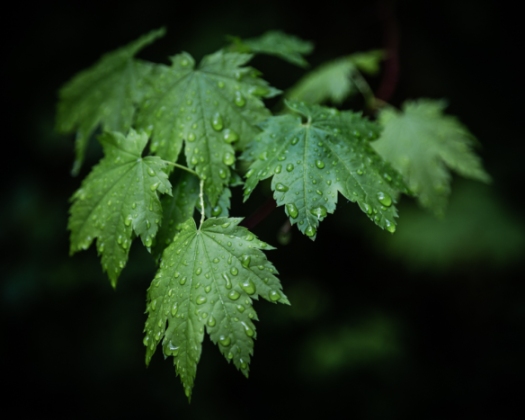
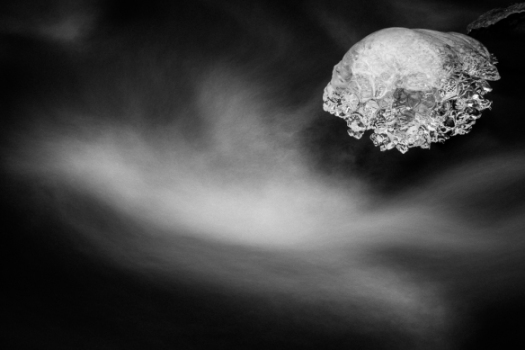
I recently upgraded my copies of Lightroom and Photoshop which of course brought with it the headache of making sure that all the plug-ins that I have for both programs were installed and working properly. In photoshop my plugins are ‘grayed out’ and unavailable to be fired up unless you have a photo open. So to solve that problem I opened one of the leaf pictures that I had intended on working on but hadn’t gotten around to it. I opened the leaf image and started OnOne Software’s “Perfect B&W’ plugin. I tried some of my favorite black and white presets. There are lots panels with lots of sliders that you can use to further tweak the image. One panel that I wasn’t familiar with was the ‘blending’ and so I spent some time playing with the various options and was surprised and pleased to discover that using the overlay mode gave me the image above. I liked it so much more than the image I started with which is below.

Nixon_130515_4122-2

Could I have gotten there with just Lightroom or Lightroom and Photoshop? Maybe… I realized that the image out of the OnOne plug in had a vignette (easy to do in Lightroom), and was a bit crunchy – had either a lot of contrast or clarity or a combination of the two added.

Adding a vignette was easy – I generally use ‘Post-Crop Vignetting’ and dialed in -33 using the highlight priority option in LR5.

Leaves_Vignette

Cruchiness wasn’t so easy. I thought that clarity would give the effect that I was looking for. Ramping clarity up to 100% gives the crunchiness I was looking for but there’s still something missing.

Leaves_Clarity

Adding a strong constrast curve gets us closer but the image is too green.

Leaves_Contrast

Finally desaturating a little using both saturation in the Presence panel and also the green slide in the HSL panel gives the image below.

Leaves_Desat

A vast improvement over the original and I like it better than my target image. I found this to be a useful exercise in exploring the power of Lightroom which I’m sure will come in useful.

Playing with Presets Redux: Black & White Preset Download

Nixon_130517_5888

When I originally wrote about using presets to explore the potential in my images I had intended on providing the final black and white preset that I made as a downloadable file. Unfortunately I couldn’t quite figure out how to do it. Should be easy enough right?

I continued to use the preset and have used it on all of my black and white images that I’ve posted here over the last few weeks, including the one above. Then finally I figured out how to provide the file.

Click here to download the preset and instructions on how to install it.

Installation of the preset is quite easy:

1. Open Lightroom

2. Navigate to the ‘Develop’ module

3. Find ‘User Presets’ in the presets panel on the left hand side.

4. Right click or control click on ‘User Presets’ to open a menu.

5. The menu has 2 options – New Folder and Import. Click import.

6. A file browser will open that will allow you to navigate to the preset you downloaded. Click on the preset you wish to import and then click ‘Import’.

7. That’s it! The preset should now be loaded into the ‘User Presets’ section of the Lightroom develop module.

To use the preset is easy enough. Select the image you want to work with, open the develop module (I usually just hit the ‘d’ key), under the user presets click on the B&W Preset. Done!

Of course sometimes you might be done, other times you might want to work the image a little more. The most common additional edits that I do are: apply lens correction, change the vignette – which is found under the effects panel on the right hand side, and to change the grain characteristics – also found under the effects panel.

You might want to do other things but I hope that this serves as a solid jumping off point. Let me know if you like this, how you’re using it, what works, what doesn’t. I’d appreciate the feedback.

Playing Around with Presets

Nixon_130208_0409-8

Rare are the days when the photograph that pops up in lightroom is close to what I had imagined it should look like and a few tweaks and I’m done. More common are the times where I have some playing to do in lightroom and then photoshop but I know where I’m heading and then there are those images that I just wonder what I was thinking. Believe it or not, the image above started out in this last category.

The image out of the camera is shown below.

Nixon_130208_0409

After a few moments of not really knowing what to do with it I started clicking through the presets built into the develop module. I haven’t been a big fan of presets preferring to know exactly what slider I was changing and why. Clicking around though it quickly became apparent that this photo should be black and white. The five built in presets gave the following ‘looks’.

Nixon_130208_0409-2 Nixon_130208_0409-3
Look 1 Look 2
Nixon_130208_0409-4 Nixon_130208_0409-5
Look 3 Look 4
Nixon_130208_0409-6
Look 5

I liked looks 2 and 3, with not a lot to choose between them for me. I chose version 3 as a starting point and made it a little darker and a little grainer. The image below was the result.

Nixon_130208_0409-7

A little bit more clean up and I was done. I must admit that this experience changed my outlook on presets. They’re great starting points, to be pushed further or dialed back, and invaluable to get a quick sense of what different processing could do to your image. Even better if you make your own and share with friends.

Nixon_130208_0409-8

Taking a Mulligan

Nixon_120604_0763-Edit-Edit

Everyone deserves the opportunity to have another go, to reinterpret and reimagine their work. The more that I understand lightroom and photoshop the more possibilities there seem to be. In an interview with Michael Kenna I recently read he said that one of photography’s greatest strengths is that it is (or at least was) tied to reality. That tie is clearly broken for those that wish it to be. While I’ve yet to push reality hard, I have started to play a little. The image at the top of the page is a reworking of the image that I posted a few weeks ago based on the feedback that i received here and to fix a few things that bugged me which I didn’t know how to fix at the time. So a mulligan, a do over, let me know your thoughts.

25 Photography Books I'd Take to a Desert Island

20120318-163912.jpg

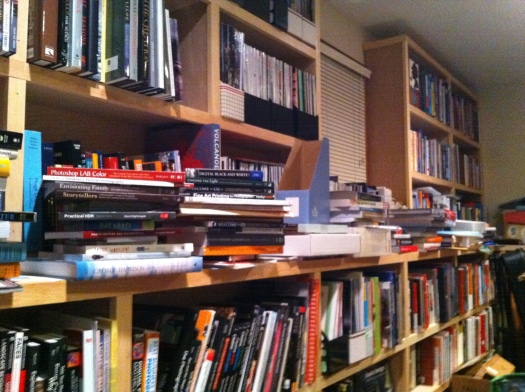
As you can probably tell from the photo above, my book collection is getting a little out of control. While I would have a hard time paring it down and parting with any of the books I thought that it would be a fun exercise to select 25 ‘how-to’ books to hang on to. I decided to select a set of ‘how-to’ style of books. Some a very practical nuts and bolts of how to use Lightroom or Photoshop, some point the way ‘how-to’ using examples from the authors, some feature exercises designed to help you find your way of capturing images, some ask more questions than they answer and finally some help with talking about your work and sharing it with the world. These are all books that I still find useful, although not necessarily ones that I would recommend to someone who’s just picked up a camera. I’m sure this would be different to your list and would be happy to hear what you would have included. A ‘top ten’ from my collection of art books, monographs etc. in the coming weeks.

Scott Kelby’s 7-Point Sytem for Photoshop CS3
Adobe Photoshop Lightroom – Martin Evening
Adobe Photoshop Lightroom – Scott Kelby
Adobe Photoshop CS5 for Photographers- Martin Evening
Adobe Photoshop CS5 for Photographers: The Ultimate Workshop

Adobe Photoshop Masterclass: John Paul Caponigro
Welcome to Oz
The Photoshop Darkroom
George DeWolfe’s Digital Photography Fine Print Workshop
B&W Printing: Creating the Digital Master Print

The Photographer’s Eye
The Photographer’s Vision
The Photographer’s Mind

Visual Poetry
Photographing Childhood

Within the Frame
Visionmongers

The Moment it Clicks
Examples: The Making of 40 Photographs

Landscape Within
Landscape Beyond
Finding the Picture

Criticizing Photographs
Why Photographs Work
Publish Your Photography Book

The Circular Journey from Vision to Print

It struck me over the weekend that the path to realizing our vision, whether that’s on the computer monitor or on paper for the old school folks, is circular. I’ve been mulling over technical skills and aesthetic choices over the last couple of weeks resulting in the postings last week regarding conversion to black and white and also getting a better understanding of our sense of aesthetics. The final image to me then is a result of combining these with creativity. Simply put:

Realized Vision = Aesthetic Choices + Creativity + Technical Skills

I often feel that many of the initial photographs in a series are the result of happy accidents, either in the field when I just try something for the sake of it or when I’m back in front of the computer when again I play the game of ‘what happens if I do ….’. Taking that experience and then repeating it in different circumstances and situations then allows me to build that series. Whether it’s playing around with toy camera effects, shooting in black and white, or shooting long exposures all have been informed by what’s gone before. Having a better sense of the possibilities, particularly for post-processing of my images, means that I am ever more aware of possibilities for my photography.

Book Module in Lightroom 4 Beta

There has been a good bit of fanfare surrounding the release of the beta version of Lightroom 4. One of the new features that caught my eye was the integration of a variant of Blurb’s booksmart software, making it possible to layout and then send to Blurb for production a book of your photographs. As someone interested in delivering my photographs to the world not just as prints but in the form of books this is a very cool development. While I frankly would have preferred the book module to be a generic layout tool not tied to any single book producer, perhaps pulling key features from Adobe’s In Design product, Blurb has a tremendous range of products that surely suits the needs of most, if not all, people interested in having a book of their photographs.

Check out the tutorials from the excellent Julieanne Kost below.