Notes From The Road

After two weeks of dealing with an virus that went through our household decimating everything in it’s path I’m finally getting back to something like normal. It’s interesting to me how presumably the same virus can manifest itself differently, shining a light on your weaknesses? My son and I both had respiratory problems which involved a trip to the hospital for him and a lingering shortness of breath for me. I’m still winded doing the simplest of tasks, even something as simple as walking feels like I’ve just done something strenuous. Hopefully it won’t last for too much longer.

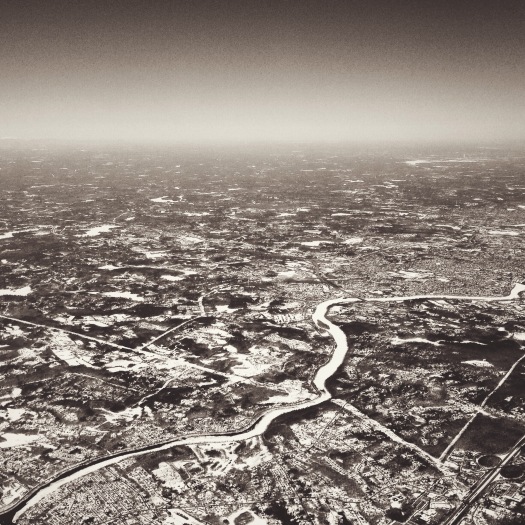
I’m once again on the road. It was fun to see Massachusetts and all the snow that we’ve had this winter from the air. I was surprised that there wasn’t more ice in the bay but I should be careful what I wish for!

Print Your Work!

Processed with VSCOcam with kk2 preset

I’ve been involved in a couple of conversations recently about the value of printing your work. With most of us now using digital in one form or another there’s an overwhelming temptation to let your photographs sit on the computer, or on the web in one place or another and not be printed.

There are a number of reasons that we could debate for printing – prints have historically been the archival record – when the house is burning down you’re not going to run in and save your server, network attached storage or desktop computer in the way that you might have saved the family photo album. I’m sure everyone has their work backed up both in the cloud and physical drives at a secure distant location so this is less of a concern.

I would argue that printing does make you a better photographer though, whether your intended output is for the web or not. Prints are less forgiving than web and so you have to get it right, sharp where sharp is needed and appropriate and a file that is large enough to support the print size which forces you to ‘get it right in camera’

Even though the cost of ink jet printers has dropped substantially and the resources for obtaining a good print increased in equal fashion, making it quite possible to make good prints yourself at home, there are a number of companies that will make the prints for you. I was experimenting with the print service from Artifact Uprising while I was in Japan recently.

As I mentioned previously I’ve been using my iPhone camera as a tool to help me break out of the rut that I’ve felt that I’m in. I thought that If I could take 250 images that I like over the course of the year it ought to be possible to cull those to make a 50 image book as a record of the year. I’d heard good things about Artifact Uprising and wanted to try them out before I got to the book stage.

One morning while I was in Japan recently I had a few moments to kill and so I uploaded 5 or so images that I’d posted to instagram to the artifact uprising site using their mobile app and ordered a pack of prints. The whole operation took less than five minutes. When I got home from Japan I had a stack of amazing prints (5×5) on really heavy paper stock that I could handout to friends and family and to have as a record of the trip.

Not big prints for sure but a fun way to get my images off my phone and for me to start to look at them and really think about how they work as images. Give it a go, you won’t be disappointed.

Permission to Play

IMG_2734

I’ve been feeling overwhelmingly stuck and uninspired over the last few months, perhaps longer if I’m being honest with myself. That’s not to say that I haven’t had my moments but it’s been and continues to be hard going.

The usual advice that you get in these circumstances is to keep going. Work yourself out of the funk, make a lot of work and see where that leads you. My advice to myself was to play more.

After a bit of digging I realized that I was working within a particular sent of constraints that had provided a useful framework at one point but now were stifling. I needed to step back and break the rules that I’d established for myself.

Playing the camera on my iPhone has been enormously helpful in breaking one of my rules – always shoot on a tripod – it also forced me into using a single lens which made me move around and change my point of view to get the shot that I was interested in.

I also pushed beyond the boundaries that I am comfortable with in processing these images, often adding a lot of contrast, a texture, a tilt shift look, really piling stuff on until it was in a realm that was totally alien to me. I think that Brian Eno would do similar things in music production push beyond the limits but then retreat to a useful and usable position.

I’ve been enjoying playing and continue to do so. Here’s a question for you:

What ‘rules’ either acknowledged or not do you follow? How could you systematically break them.

I’d love to hear what restraints you impose on yourself.

The Best Camera

IMG_2079.JPG

I’ve been on the road for a couple of days and will be traveling for a few more. I’ve been using my iPhone to make ‘sketches’, to try out ideas and stretch a little. I am however also drawn to the familiar as you can see from the above image.

New York, New York!

Nixon_141006_1767

I was in New York recently – what an amazing place. More vibrant at 10.30 pm than 2 pm.

I’m thinking about community this week – who listens when you talk, supports you when you need to be supported, and kicks you in the pants when you need to be spurred on to be as good as you can be?

A Commitment to Becoming a Better Photographer

Nixon_121212_4148
To follow up on my previous post I thought that I’d share some of the things that I’d done to improve my photography and hopefully they may be useful to you. At the time I did all of this stuff I felt that I was a late starter and wanted to accelerate my learning as much as I could. This meant using the expertise and experience of photographers that I liked to quickly get a solid foundation. Please do chime in with your thoughts and comments too.

1. Find your true calling. Work out what appeals to you, what repels you. Start a scrap book real or virtual of images that appeal to you. Make a list of common attributes – color or black and white, landscape, portraiture, wildlife, fashion, wedding, dig a bit deeper what else do these have in common, what differentiates them.

2. Find a mentor. Have you found yourself gravitating to one or two photographers? Study what they’ve done and how they got the shots you particularly admire. Of course if they’re alive today they probably teaching workshops – take a workshop with them and get some advice from your photographic hero. Not only will you get some insight into how they achieve their signature works but you’ll also get some feedback on your own work.

3. Get the right gear. Figuring out what gear your heros are using to get the shots you admire and get the same stuff. Somethings you’ll want to buy now, others you should rent. But without getting the gear to get the shot you won’t get the shot. A good example for landscape photographers is a rock solid tripod – get a good one and it will last you for years.

4. Do what your heros do to get the shot. When I was at Alison Shaw’s Workshop on Martha’s Vineyard in 2009 I was bemoaning my lack of progress to Alison’s assistant Donna Foster. Donna quickly pointed out that there was a progression to my work but that my biggest problem was that I wasn’t shooting in the best light and that if I wanted to improve I should find some time to get out early or late and shoot when the light is good.

5. Get feedback on your work. There are a number of ways to get comments on your work I prefer one on one portfolio reviews with someone who is going to be brutally frank. Feedback from workshop instructors is also very useful, as can be comments from friends whose opinion you trust and value.

I hope that you found this useful. I’d be delighted to hear what you’ve done to improve.

The Value in Competition?

It’s been a big few days for sport here in Boston. Friday was the first home game for the Red Sox and today is the Boston Marathon.

Fitting then that I had a conversation at the end of last week about the sport of photo competitions. If we ignore all the flat out bad things about photo competitions – that they are money earners for the organizations that are running them (not strictly bad) and attempt to get royalty free images – are they useful?

You could argue that competitions give you an opportunity to judge your work against that of others and also that this is also an effective way to market your work and build an audience. I would say no on all points. Art is subjective, ask three people and you’ll get three different answers. Competitions can be an effective way to get your work out to a broad audience, that is, if you win. Otherwise there’s probably not a lot of value in it.

It’s always nice to win, for some this is more important than it is for others,

Competitions bring out the worst in me. In a competitive situation I want to win and will do whatever it takes to win. I don’t think that this is terribly useful when it comes to fine art photography where the goal, or at least my goal, is to effectively capture my emotional response to the scene in front of me or to make the image that’s in my head. As soon as I start thinking about what it takes to make a successful image before I’ve made it then I’m not going to be true to myself.
I don’t view fine art photography as a competitive sport. For me it’s much better to use your own work to benchmark against, a little like the runner who is interested in personal best time, but to do that after the fact. After you’ve made the image and worked it up. Then see how it fits with the rest of what you’ve done and whether this meets the standard you’ve set for yourself.

Competitions aren’t an end game for me. I may enter the occasional competition but it will be will photographs that I made for myself not with the competition in mind. What’s your position on competitions?

Competitions bring out the worst in me. In a competitive situation I want to win and will do whatever it takes to win. I don’t think that this is terribly useful when it comes to fine art photography where the goal, or at least my goal, is to effectively capture my emotional response to the scene in front of me or to make the image that’s in my head. As soon as I start thinking about what it takes to make a successful image before I’ve made it then I’m not going to be true to myself.

The Importance of Story

20120201-091212.jpg

What do you think of when you see or hear the phrase ‘visual story-telling’? My mind immediately goes to the classic Life magazine photo-essays such as Eugene Smith’s ‘The Country Doctor‘, or the kind of article you might see in the National Geographic the Smithsonian magazine or my new favorite magazine Orion.

My reaction has also been that I don’t see the world this way, that I’m not trying to tell a story but look for things that resonate with me. That there’s no story here. In part that’s true but stories are all around us, whether we realize it or not. Any time there is a gap in our understanding we tell ourselves a story to explain it. Any time someone does something we like we tell ourselves a story. Any time someone does something that we don’t like we tell ourselves a story. The photographs that we choose to take do tell a story, whether that’s our intention or not. They tell people how we see the world.

The more we understand our own story the better placed we are to tell it to the world and the stronger this understanding the more likely that your work will be unique. My question for you then is ‘What’s your story?’

3 Things I like About iPhoneography and a Couple I Don't

20120123-103127.jpg

1. My Camera is always with me.

There have been so many times when I wished I had a camera with me and regardless of how small the ‘pocket’ camera is I never have a pocket big enough. My iPhone goes everywhere with me.

2. I’m ‘playing’ more than I do with a DSLR.

Along with having the camera with me all the time I’m trying things that I would never have tried with a DLSR such as shooting from unusual angles and trying out different types of processing.

3. Lomo

I’d never heard of the Lomo LC-A camera before I started using the Lomo preset in PhotoToaster. Now I’m half seriously thinking about getting one. Until then I’ll keep trying out the Lomo preset on all of my color images.

… and a few things that I don’t

1. Small file size and consequently small prints.

Some of the iPhone photos I’ve taken in the last year I love but I also know that I will struggle to make big prints from them.

2. Apps that dump data and make small files even smaller.

I love the Hipstamatic app but what’s up with the tiny files?

3. iPhoneography?

Really? That’s the best we can do? How about we just say photography?

Add your voice to the conversation – leave me a comment.

iPhone Lomography – My Current Workflow

As I’ve mentioned before here, I’m having a blast working with the camera on my iPhone, largely pushing into territory I had previously thought was not for me. One of the presets that gives an effect that I like is ‘Lomo’ in the app Phototoaster. Not being a student of history it took me a while to realise that ‘Lomo’ actually refers to a camera, the Lomo LC-A, that has somewhat of a cult following. Characteristic photos from the Lomo LC-A have effects caused by light leaks, strong vignettes and rich, saturated colors. Often lomographers will shoot with slide film and cross-process to give strong color shifts. Take a dip into the Lomography photostream here.

While I mull over the purchase of an LC-A+ I’m going to continue playing with my iPhone. Read on to see how easy it is with the iPhone.

I am typically using Camera+ rather than the camera app that comes with the iPhone. Here is the image as shot. Lots of problems with this, my biggest criticism is that I should have been closer to crop out the sky and the trailer. You can zoom with Camera+ but be aware that it is a digital zoom – in effect you’re just using less of the sensor. If I have to crop I’d prefer to do it in software after the fact. I’ll admit that I think cropping is not a big deal particularly with my DLSR but is an issue with the small files that come from the iPhone, so try to get it right in ‘iPhone’ as it were.

The first step is to bring the file into PhotoForge and do some preliminary editing. Photoforge is a great app with lots of capabilities, curves, sharpening, cropping, textures, frames and effects and is one that I highly recommend. One of the neat things is that Photoforge has layers so you can work in a layer based manner if that is something that you’re used to. I generally am not using layers but I’m also just doing very simple edits. I will generally look at the levels panel and tweak there if I think the image needs it. In this case it didn’t a levels adjustment and so I moved on to add a bit of contrast using the curves function. I didn’t like any of the other tweaks that I might usually add and so I saved the file back to the photolibrary and jumped into Phototoaster.

I’m almost exclusively using Phototoaster now to add the Lomo effect. There is a Lomo effect in PhotoForge but it feels a bit washed out for my taste. I cropped the image to a square to remove the distractions and applied the Lomo effect which can be found …

I like the square but also wanted to see what else I could do. Here I didn’t lock the crop to a particular ratio and came up with this crop that I particularly liked and as before then added the Lomo effect.