

I was working on my project “Everyday Objects’ this weekend and shot the image above of what I believe is a wasp’s nest with my newly renovated tripod.
In reading about how to care for and maintain your tripod I actually went and read some of the manuals that are supplied with Gitzo, Really Right Stuff etc. style tripods. Not something that I would normally do being the type of person who shuns manuals in favor of a more intuitive exploration of the functions of a new piece of gear. You should have seen me trying to start the rental car in Iceland – but that’s a topic for another day.
Really Right Stuff tell you that ‘Sand and saltwater are your tripod’s worst environmental enemies.’ About half, if not more, of my tripod use is at the beach so it’s hardly any wonder then that my tripod finally started to complain recently after many years of good service.
Carbon fiber tripods such as my old Gitzo 1325 are generally simple to look after and should last for an exceptionally long time. I’d hoped that I’d only have to buy one tripod which now seems like wishful thinking but a few simple precautions should keep your tripod in good shape.
General Cleaning
Wipe down the tripod legs with a damp cloth to remove mud, sand and salt water. Dry the legs off before collapsing.
Check all metal fittings for signs of corrosion and replace as necessary. Spare parts should be available from the manufacturer. Here’s a pdf of the parts for my 1325 tripod to see how it breaks down. The Gitzo Service Center can be found here. For old tripods spare parts can be a pain to find. It pays to anticipate future needs!
Disassembly
Disassembly and a more thorough cleaning is recommended after immersing one or more of the leg joints in water and getting water up inside the tripod legs.
This is a case of do as I say rather than do as I do. Although I’m sure if I followed my own advice I would have had less problems over the years.
Water, mud, sand or saltwater inside the legs causes a number of problems, including :
- initiation of corrosion on some of the internal parts that is difficult to diagnose until too late
- causes the bushings to swell making it difficult to open the tripod legs
Taking the tripod apart is remarkably easy even though I was convinced that I would break the whole thing if I attempted it. While the process described here is for the Gitzo 1325 from digging around it looks as though most of the equivalent tripods from other manufacturers come to disassemble in a very similar way.
Things to have on hand during disassembly:
- Spare bushings if you’ve been having problems
- Shop rags or paper towels for clean up and drying the legs.
- WD-40, used sparingly this can cut through the muck on even the most sadly neglected of tripods.
- An old tooth brush is handy to clean grit and grime from the tripod collars and threads.
- A good lubricant for the nicely cleaned threads. I used Lanocote because I had a tub handy.
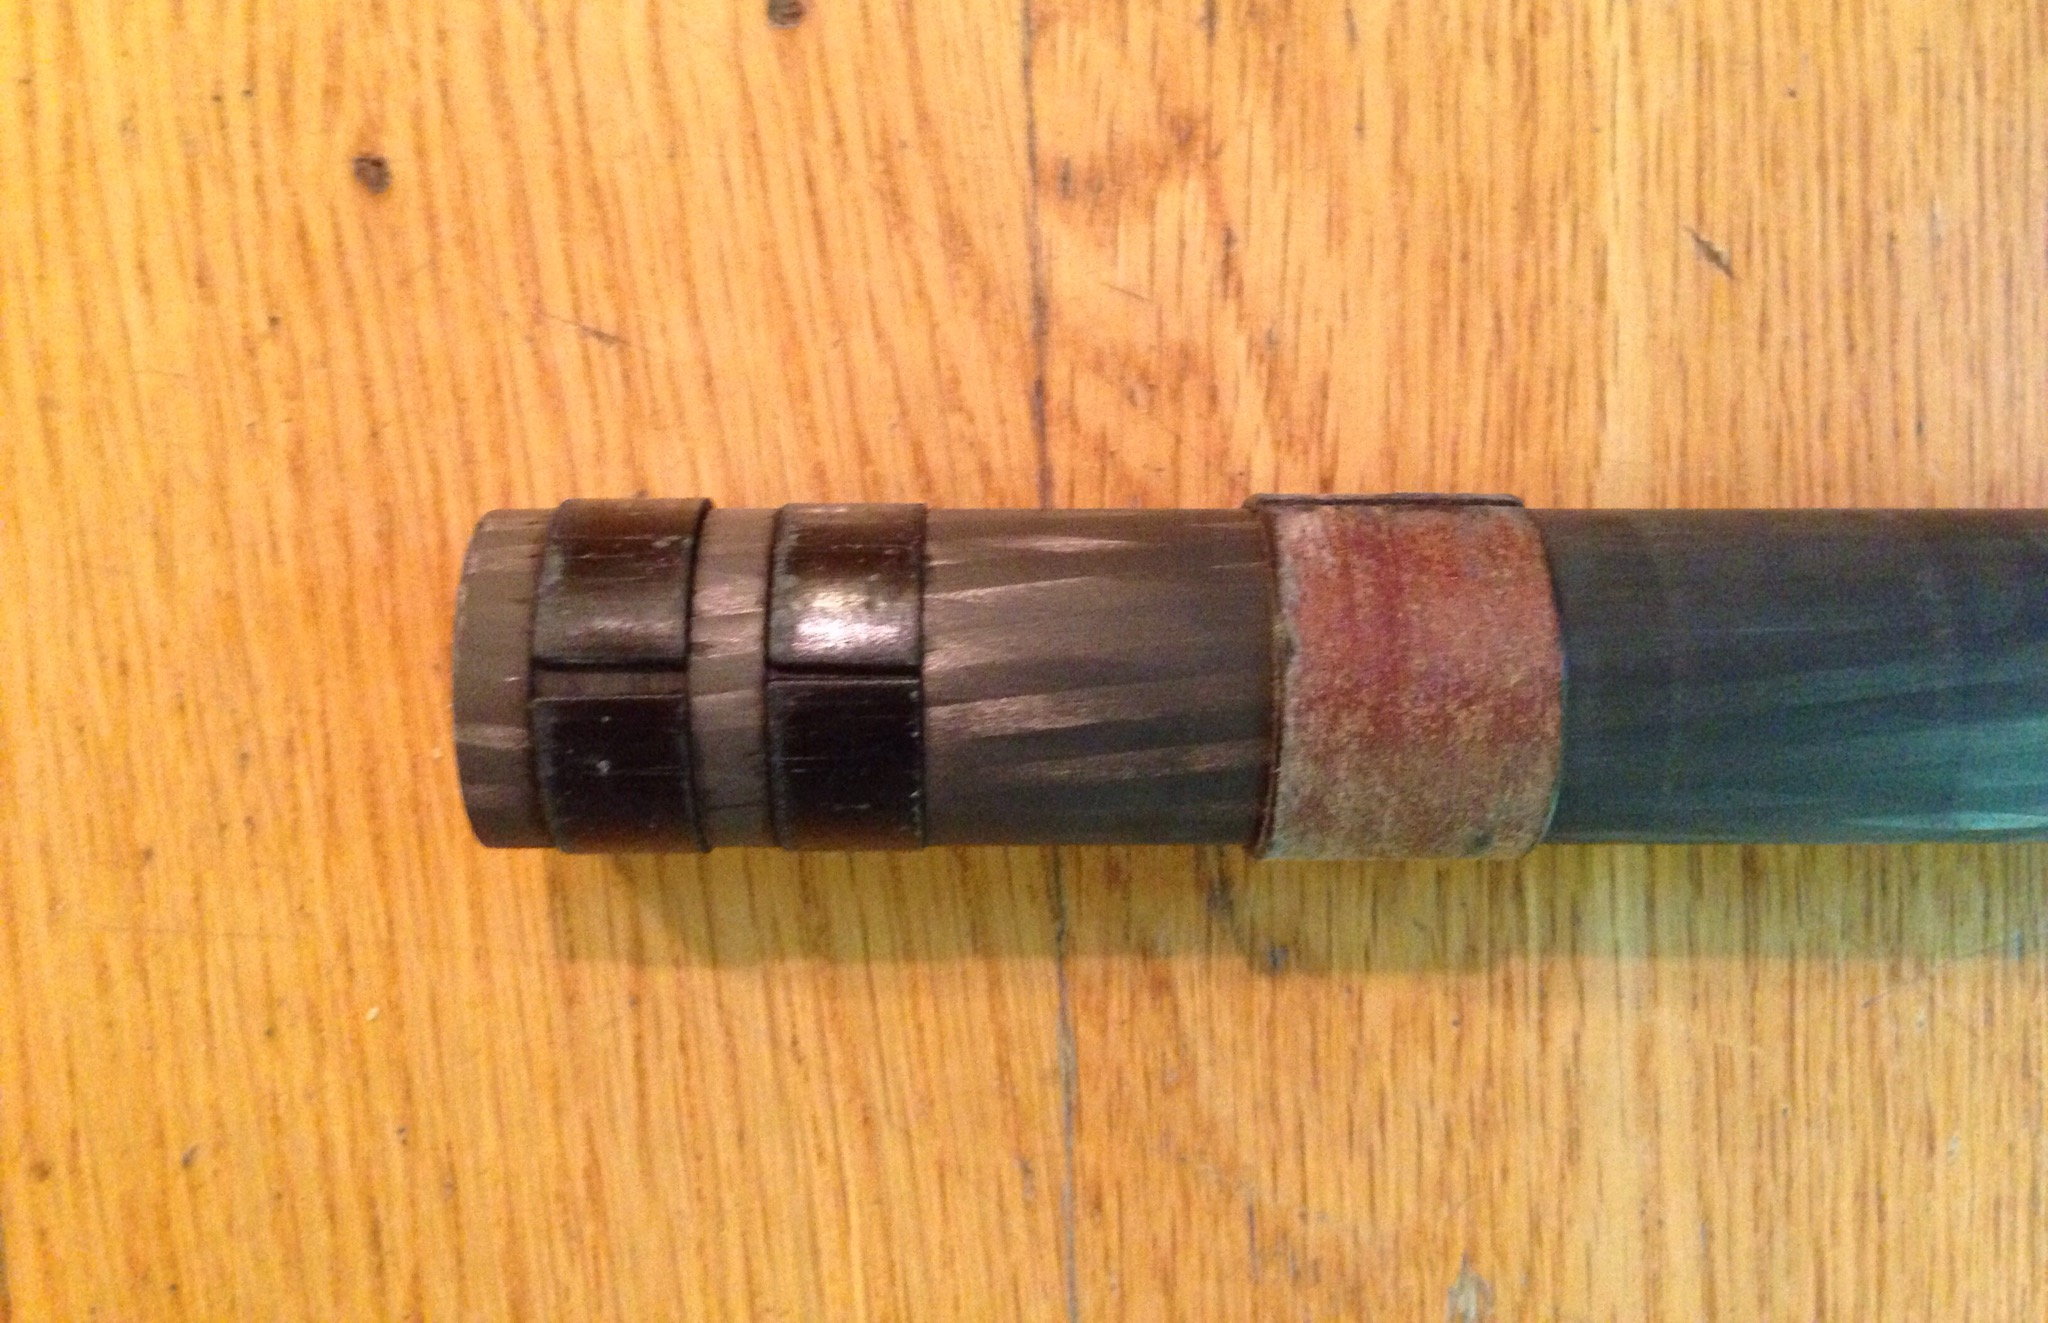
Here’s the lower section of one the legs:

Diassembly is simply a matter of unscrewing the leg collar all the way until it releases as shown here:

Hopefully you can then just pull on the leg and it will smoothly come free (- or not if you read my previous post on my disassembly efforts):

The carbon fiber bushing appears to sit under the join of the two legs and is compressed as you screw the collar tight, holding the leg where you’ve set it. You can see where it normally is in the picture above.
The plastic guides keep the leg centered as it slides inside the fatter leg above. The plastic bushings were particularly salty but cleaned up nicely as shown below.
If you look carefully you can see that the salt build up has caused some wear of these guides. I also found that it could be tricky to get these guides to sit in groove in the tripod leg properly after removing them for cleaning. This was easily fixed by compressing them as shown below.

This compression was sufficient to close the gap that you can see in the upper guide which meant that the guide seated more closely into the groove on the tripod leg making it easier to reassemble the leg.
Getting everything back together is simply a matter of reversing the process. It’s relatively easy to do, although it might take you the best part of an evening to clean up the entire tripod or longer if you have to deal with stuck leg joints as I did!
Good luck and let me know if you have any suggestions.
