Tripods – Care and Maintenance of the Three Legged Beasties

Nixon_140928_2373

I was working on my project “Everyday Objects’ this weekend and shot the image above of what I believe is a wasp’s nest with my newly renovated tripod.

In reading about how to care for and maintain your tripod I actually went and read some of the manuals that are supplied with Gitzo, Really Right Stuff etc. style tripods. Not something that I would normally do being the type of person who shuns manuals in favor of a more intuitive exploration of the functions of a new piece of gear. You should have seen me trying to start the rental car in Iceland – but that’s a topic for another day.

Really Right Stuff tell you that ‘Sand and saltwater are your tripod’s worst environmental enemies.’ About half, if not more, of my tripod use is at the beach so it’s hardly any wonder then that my tripod finally started to complain recently after many years of good service.

Carbon fiber tripods such as my old Gitzo 1325 are generally simple to look after and should last for an exceptionally long time. I’d hoped that I’d only have to buy one tripod which now seems like wishful thinking but a few simple precautions should keep your tripod in good shape.

General Cleaning

Wipe down the tripod legs with a damp cloth to remove mud, sand and salt water. Dry the legs off before collapsing.

Check all metal fittings for signs of corrosion and replace as necessary. Spare parts should be available from the manufacturer. Here’s a pdf of the parts for my 1325 tripod to see how it breaks down. The Gitzo Service Center can be found here. For old tripods spare parts can be a pain to find. It pays to anticipate future needs!

Disassembly

Disassembly and a more thorough cleaning is recommended after immersing one or more of the leg joints in water and getting water up inside the tripod legs.

This is a case of do as I say rather than do as I do. Although I’m sure if I followed my own advice I would have had less problems over the years.

Water, mud, sand or saltwater inside the legs causes a number of problems, including :

  • initiation of corrosion on some of the internal parts that is difficult to diagnose until too late
  • causes the bushings to swell making it difficult to open the tripod legs

Taking the tripod apart is remarkably easy even though I was convinced that I would break the whole thing if I attempted it. While the process described here is for the Gitzo 1325 from digging around it looks as though most of the equivalent tripods from other manufacturers come to disassemble in a very similar way.

Things to have on hand during disassembly:

  • Spare bushings if you’ve been having problems
  • Shop rags or paper towels for clean up and drying the legs.
  • WD-40, used sparingly this can cut through the muck on even the most sadly neglected of tripods.
  • An old tooth brush is handy to clean grit and grime from the tripod collars and threads.
  • A good lubricant for the nicely cleaned threads. I used Lanocote because I had a tub handy.

Here’s the lower section of one the legs:

IMG_1706.JPG

Diassembly is simply a matter of unscrewing the leg collar all the way until it releases as shown here:

IMG_1707.JPG

Hopefully you can then just pull on the leg and it will smoothly come free (- or not if you read my previous post on my disassembly efforts):

IMG_1710.JPG

The carbon fiber bushing appears to sit under the join of the two legs and is compressed as you screw the collar tight, holding the leg where you’ve set it. You can see where it normally is in the picture above.

The plastic guides keep the leg centered as it slides inside the fatter leg above. The plastic bushings were particularly salty but cleaned up nicely as shown below.

IMG_1709.JPG

If you look carefully you can see that the salt build up has caused some wear of these guides. I also found that it could be tricky to get these guides to sit in groove in the tripod leg properly after removing them for cleaning. This was easily fixed by compressing them as shown below.

IMG_1703.JPG

This compression was sufficient to close the gap that you can see in the upper guide which meant that the guide seated more closely into the groove on the tripod leg making it easier to reassemble the leg.

Getting everything back together is simply a matter of reversing the process. It’s relatively easy to do, although it might take you the best part of an evening to clean up the entire tripod or longer if you have to deal with stuck leg joints as I did!

Good luck and let me know if you have any suggestions.
Friday Inspiration: Hobie Porter

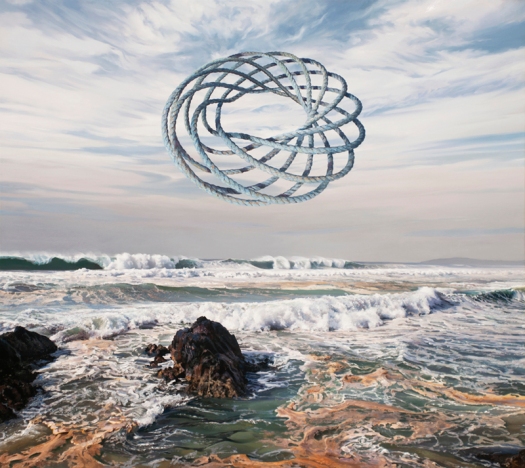
porter_resorption_oil-polycanvas_135x120cm_2011

When I first saw Hobie Porter‘s work I wasn’t sure what I was looking at – a ‘straight’ photograph, a digital mash-up or what. He is of course a landscape painter, and his work is a juxtaposition of the grand landscape with artifacts that he’s found. Perhaps not surprisingly what caught my attention are his seascapes in which he incorporates old ropes, propellers and a variety of other things that he’s found at the beach. One of the advantages that painters have over photographers is that they are able to paint what ever they imagine and so I had assumed that these beach artifacts were figments of Porter’s imagination. Not so. While there may be an element of interpretation he actually collected these objects for use as reference and then for the exhibition shown in the video below displays them as part of the exhibition. Check out the videos of Porter at work and of him discussing his art below.

Hobie Porter ‘Continuum’ from Arthouse Gallery on Vimeo.

Hobie Porter ‘Full Circle’ from Arthouse Gallery on Vimeo.

Trouble with Tripods

Nixon_140818_9005-Edit

As I was setting up my tripod for this shot this summer as I collapsed, de-telescoped, closed or whatever you call it, one of the legs the rubber foot shot off sending me scrambling to find it. Luckily I did! The glue had finally given up on the Gitzo 1325 legs of my tripod. Not bad after taking a beating for 8 years. I got a two part adhesive and glued it back in place and my tripod problems were over. Or at least I thought my tripod problems were over.

When I was using the tripod this week one i found that one of the legs was impossible to fully extend. Years of neglect had finally come home to roost. Photographing in and around the ocean means that your gear takes a pounding. Ideally you would rinse the salt water off your gear with fresh water. There are obvious problems doing that with cameras and lenses but you can and should do some clean up of your gear with a soft damp cloth after you’ve been out. I do this as needed after every shoot but I’ve never properly cleaned my tripod. This has largely been out of fear of getting the tripod to pieces and not being able to get it back together again.

I actually found that taking the tripod to pieces was much easier than I’d expected. On the old Gitzo that I have it’s simply a matter of unscrewing the leg lock the whole way and then pulling on the leg. The one that was stuck needed me to stand on the head of the tripod and then yank hard on the leg. Eventually it yielded to force! While the tripod was in pieces I took the opportunity to clean up the threads both on the leg and on the screw lock. The leg locks had been making awful grinding noises for years, presumably from sand and salt getting in there. This was easy enough to do with a rag for the legs and a toothbrush to get into the locks. As an aside I had always been taught to extend the tripod fattest section first, which of course meant that the lower section lock ended up under water the first time I used the tripod at the beach. While this advice is generally sound I typically have the lower section extended the width of my hand – about 4 inches – and then when working at the beach this is the first section that gets extended.

At the top of the tripod legs I found 3 bushings – two plastic and one that could easily be carbon fiber. Trying to get the legs back together was a little tricky and after a little bit of trial and error I realized that it was the plastic bushings causing the problems. I took these off the tripod and wound them into a tighter circle and then when they went back on the tripod the plastic stayed in this tighter configuration long enough to allow me to reassemble the whole thing relatively easily,

It was quite an educational process and easy enough that I could have been doing regularly all along!

Friday Inspiration: Jim Denevan

jim-denevan-land-art-3
Jim Denevan is a chef and an artist. As a chef he is the founder and driving force behind the ‘Outstanding in the Field‘ farm dinners. The aim for the meals is to reconnect the diner to the land, to showcase the talents of the farmers who grow the food and the chefs who prepare it. Here’s a link to the companion book. They were in Boston this week visiting Island Creek Oysters but unfortunately I missed them!

As an artist Denevan creates some of the largest drawings on the planet. Working most often with sand on California beaches, but also in other parts of the world including Siberia (!), working quickly to beat the incoming tide he creates geometric patterns that because of their scale are best viewed from the air. Very impressive. Who ever said that crop circles couldn’t be man made has never seen a Denevan drawing. Check out some videos of Jim at work below.

Jim Denevan: Sand Drawings, Spanish Banks from Michael Cox on Vimeo.

Why Do You Photograph?

Nixon_140630_5217

If you’ve been following along here, in the last few weeks we’ve been digging in to identify our purpose, the big why that is the underlying reason for the choices that we make in life. A touchstone that helps guide us through difficult decisions.

Before I leave this topic for a little while I could help but ask a final question. Why do you photograph? Perhaps related is how does your photography support your big why?

Now I’m not thinking about what kind of photography, sports, documentary, editorial, fine art etc., or what you photograph but why do you do the thing that you’ve chosen to do.

There are lots of reasons that people photograph, to capture the essence of a person or a pet, to make other people feel emotion, to preserve significant moments, to create something, as a meditative practice. The list goes on.

Making the connection between your photography and your big why can help identify new photography projects, bring existing photographic projects into focus, give a sense of direction to your work and also a reason to keep going when you’re wondering is it worth it. Additionally, as we’ve discussed previously understand why helps guide your decision making and help make sense of the myriad of options you have for spend your most precious resource of all – time.

Friday Inspiration: Hans Strand

Strand_Jokulsarlon

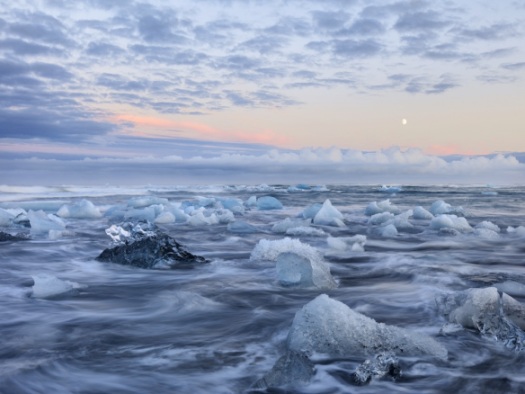
I’ve been taking a look at how people have photographed Iceland in the last few weeks. One of the photographers that came up time and time again in my searching was Hans Strand. Strand is a landscape photographer based in Sweden who has a solid body of work from more than 15 visits to Iceland over the course of 20 years. His landscapes are striking. While there is a mix of the grand landscape with more intimate landscapes, I suspect that the intimate landscapes are aerial shots that abstract the landscape. His aerial work was one of the key factors that separates his work from that of others in Iceland. For those interested in workshops, Strand’s Iceland workshops often include an aerial session, something worth consideration if you want a unique perspective.

Check out the Hasselbald promo video below that gives a behind the scenes look at Hans Strand at work in Iceland, photographing an active Eyjafjallajökull, the volcano that brought air traffic in Europe to a halt for weeks.

A Beginning?

Nixon_131223_9879-Edit

How do you come up with ideas for new photography projects? A conscious decision? An organic development of an existing project? Or perhaps looking back through your archives and finding common themes.

Over the recent break I recently found the house in the photo above. While I was taking the photo a town worker gave me a brief history of the property. Clearly it’s abandoned and in a state of disrepair.

I see these abandoned properties everywhere, and while I’d wondered about who lived there, why did they leave and why is it now left to rot, I had never photographed them. Given my sensitivity to these abandoned properties it seems as though I should photograph them, at least until they’re out of my system.

What do you notice all the time? Perhaps that would make a good project?

You Keep Shooting

Nixon_130517_5940-Edit-Edit

If you’ve ever watched any of Brian Peterson’s short photography instruction videos then you’ll recognize the tag line in the title of this post.

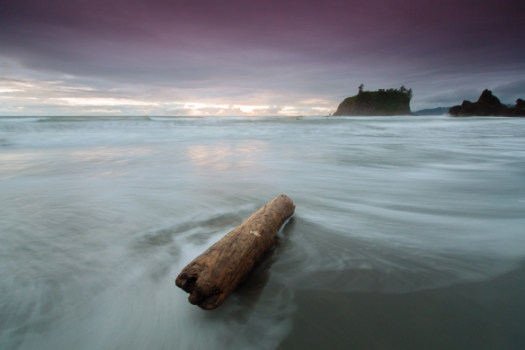
What actually went through my mind as I was reviewing photos from this evening shoot at Rialto Beach was ‘I should have kept shooting’. In my defense the circumstances were challenging. The tide was doing odd things. It would recede and seem like it was going out, but then the next wave would come 2 or 3 feet higher up the beach than it had for the last five minutes. I was getting caught out by this every time and I was getting wet. So what I had was a set of images where the log rolled and was blurred, the tripod moved as it sank in the sand and on and on. It wasn’t until I got to the last image in the set that I had the one at the top of the page. In hind sight I should have stuck with it at least a little while longer. I could have taken my shoes off and rolled up my pants, or just embraced getting wet and dealt with it. Whatever I did I should have kept going.

A lesson for next time – commit to getting the image and stay with it.

Gone Fishing

Nixon_110813_4-Edit

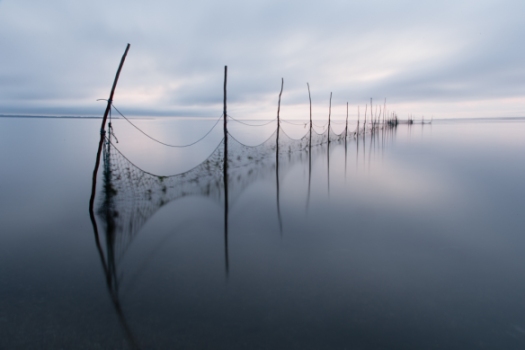
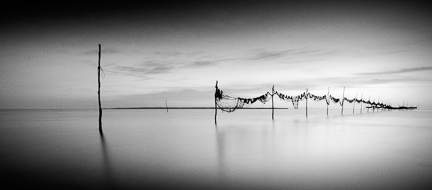
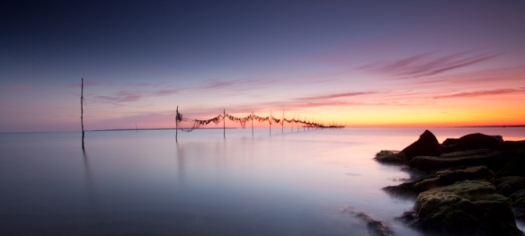
I’m continuing to play with black and white conversions of photos from my archive. The above photo is the latest image that I’ve played with and is one that was originally posted here and is also below. Check out the original and the new version – I’d be interested in your comments.

Nixon_110813_3368